


In this post, we will discuss the step-by-step process of booking Genie+ reservations at Walt Disney World, how to modify them to fit your schedule, and the procedure for canceling Genie+ reservations if needed.
Let’s dive in…
Update! Major changes are coming to the Genie Plus System, effective July 24, 2024.
Changes include:
How to purchase Disney Genie+ in the My Disney Experience app
If you are considering Genie+, you’ll first need to purchase it. Here’s how that works.
1. Open The My Disney Experience App
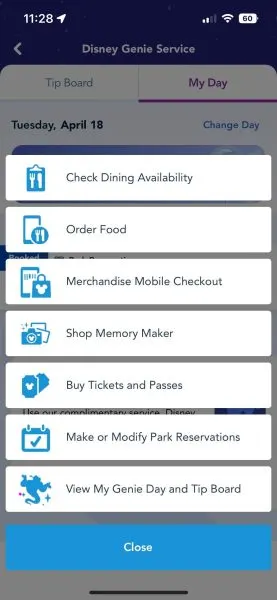
Hit the “+” at the bottom of the home screen and tap “View My Genie Day and Tip Board”.
2. Navigate To Tip Board Tab In Disney Genie
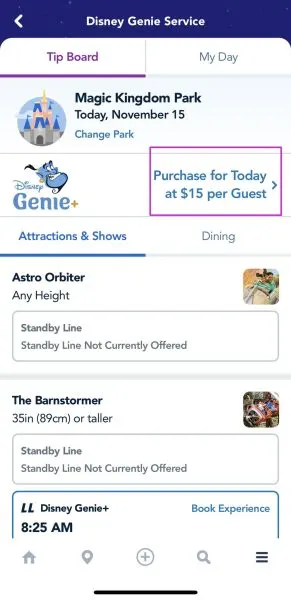
At the top, you’ll see a banner that reads, “Purchase for Today.” Click that.
3. Click Through This Disney Genie+ Prompt
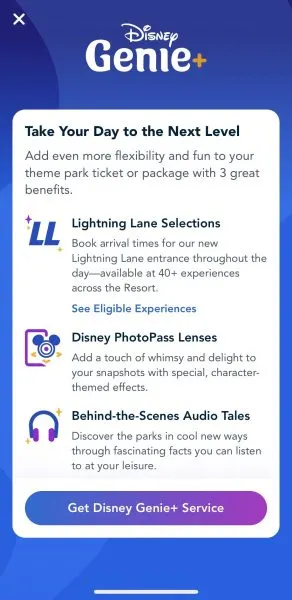
Click the button at the bottom of the screen to “Get Disney Genie+ Service”.
4. Confirm Your Party
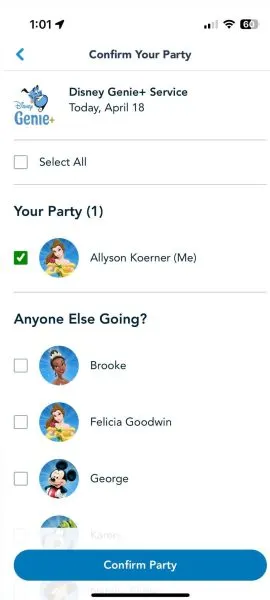
Select everyone you will be purchasing Genie+ for and then click the button at the bottom of the screen to “Confirm Party”.
4. Review Details
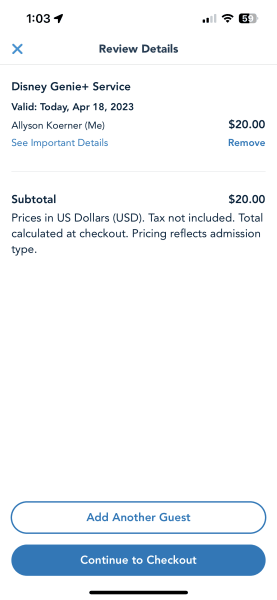
From here you can go back to add another guest, or you can continue to checkout.
Important: Not only do you need to make sure your travel party members are in your Family & Friends list, but they must have valid theme park admission and the same theme park reservation. Otherwise, their names won’t show up, and they won’t be able to be added to your Genie+ Lightning Lane selections.
5. Confirm Your Contact And Payment Information

On the payment screen, you’ll confirm your contact and payment information. If you would like, you can select a different payment method at the bottom of the screen. Once you are done, you’ll select “Purchase”.
How to make a Genie+ selection in the My Disney Experience app
1. Open The My Disney Experience App
Hit the “+” at the bottom of the home screen and tap “View My Tip Board and Day.”
2. Navigate To Your Tip Board In Disney Genie
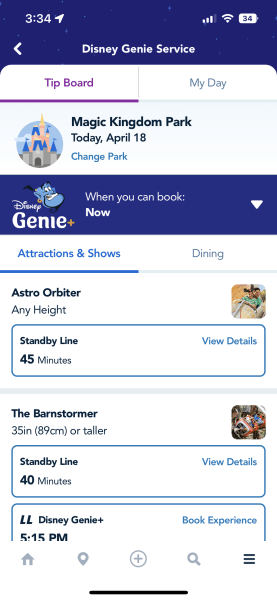
All Walt Disney World Resort guests can start making Genie+ Lightning Lane selections starting at 7 a.m.
When the booking window opens, navigate to your Tip Board in Disney Genie. You may need to pull down to refresh.
Note: The current window time available for Genie+ Lightning Lane selections is listed under “LL Genie+”
3. Make Sure You Are Looking At The Correct Park
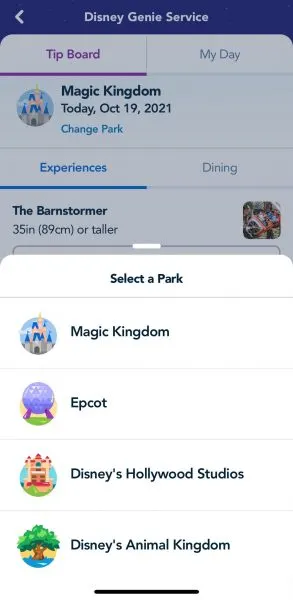
You can change the park you are viewing by tapping “Change Park” located at the top of the Tip Board directly underneath the park name listed.
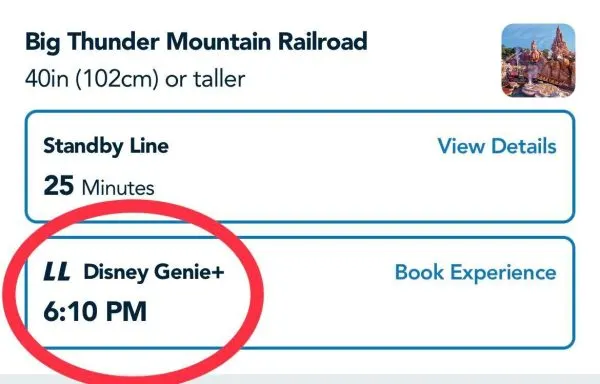
3. Select Your Attraction
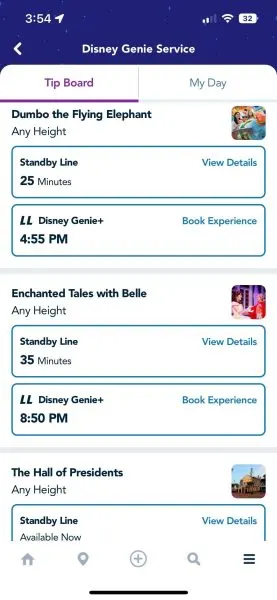
Note: The current window time available for Genie+ Lightning Lane selections is listed under “LL Genie+”
4. If Necessary, You Can Edit Your Party At This Time
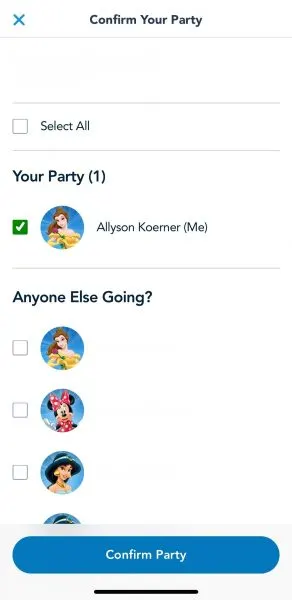
You can either add or deselect guests. Once finished, select “confirm party”.
Important: Not only do you need to make sure your travel party members are in your Family & Friends list, but they must have valid theme park admission and the same theme park reservation. Otherwise, their names won’t show up or they won’t be able to be added to your Genie+ selections.
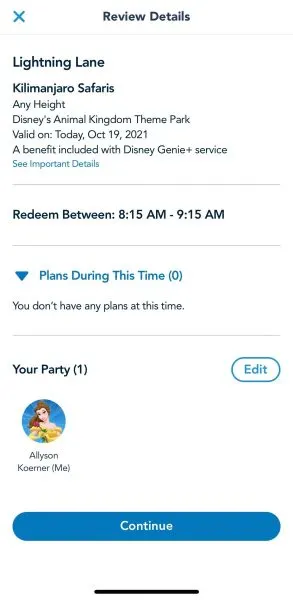
5. Review the Details
You can either add or deselect guests. Once finished, select “confirm party”.
Important: Not only do you need to make sure your travel party members are in your Family & Friends list, but they must have valid theme park admission and the same theme park reservation. Otherwise, their names won’t show up or they won’t be able to be added to your Genie+ selections.
Be sure to check your existing plans (tap the arrow next to “Plans During This Time”) so you don’t have too much of an overlap of selections.
If you have a Park Hopper, you can purchase Genie+ Lightning Lane selections at parks other than where you have a park reservation. Keep in mind that you have to do it after 2 p.m., when park hopping begins at Disney World. Once you’ve confirmed your party, you can review the details and hit “continue” to lock in your booking.
6. Reservation Confirmed
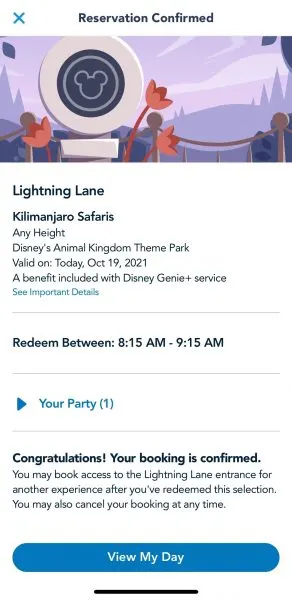
You’re all set. You can go to “View My Day” or hit the “x” to exit.
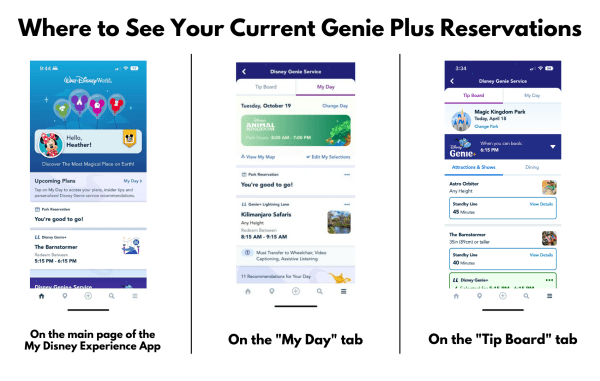
Where to Find Genie+ Reservations in My Disney Experience
If you’ve already made a reservation, here’s how you can see what you have:
On the My Day Tab
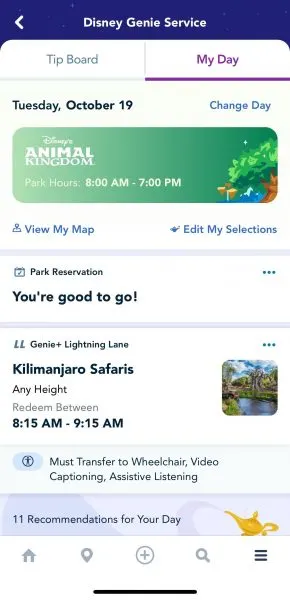
Navigate to the My Day tab inside of Disney Genie.
There you’ll find any plans you’ve made, including Advanced Dining Reservations, Park Pass reservations, and Genie+ reservations.
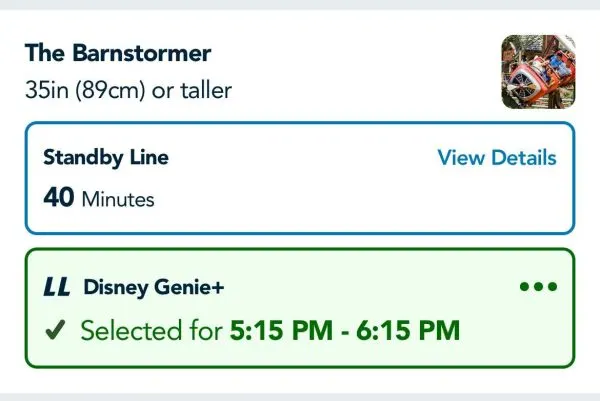
On the Tip Board Tab
If you don’t have any Genie+ reservations, the tip board will look like this:
But when you have a Genie+ reservation, you’ll see the attraction highlighted, like this:
On the Main Page of the My Disney Experience App
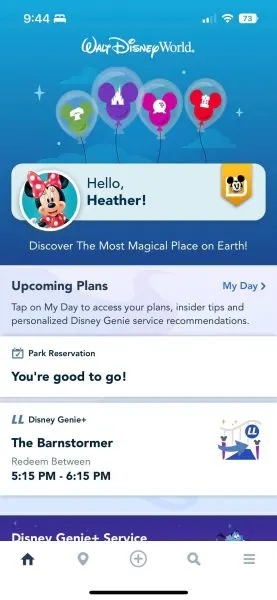
You’ll also be able to see your reservations on the main page of the My Disney Experience App.
How to Cancel a Genie+ Reservation
If you need to cancel a Genie+ reservation, this is how that works:
1. Open The My Disney Experience App
Hit the “+” at the bottom of the home screen and tap “View My Tip Board and Day.”
2. Select the Genie+ reservation you wish to cancel
Find the Genie+ Reservation you wish to cancel, and select it.
3. Select Cancel
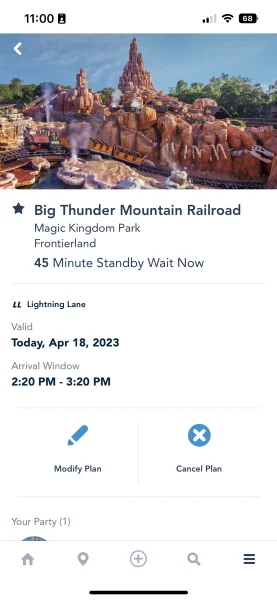
Once it has opened up, select “Cancel”.
How to Modify a Genie+ Reservation
1. Open The My Disney Experience App
Hit the “+” at the bottom of the home screen and tap “View My Tip Board and Day.”
2. Select the Genie+ reservation you wish to modify
Find the Genie+ Reservation you wish to modify, and select it.
3. Select Modify
Once it has opened up, select “Cancel”.
3. Choose a New Time OR a Different Attraction
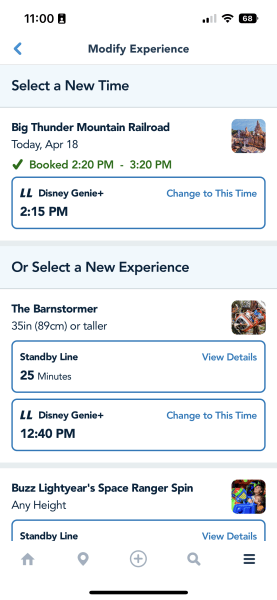
You’ll be given the option to change to the next available time at the same attraction (if available), or you can select a different attraction. Keep in mind that you cannot choose your return time, you’ll only be shown the next available return time for all attractions.
4. Confirm the Changes
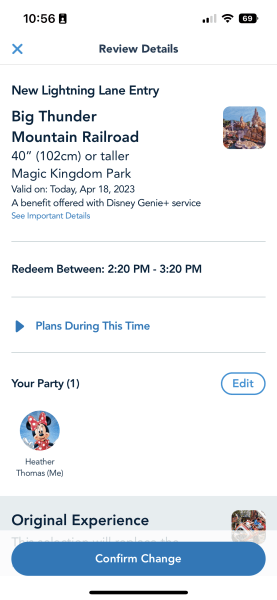
The confirmation screen will show you your original reservation and any plans you may have at this time. After you’ve reviewed the changes, click “Confirm Change“.