


If you’re heading to Disney World and want to avoid long lines, mastering Lightning Lanes is the BEST way to do just that – and the tips below will help.
We have a lot to say that we know will help you have the best experience possible, so let’s dive right in!
Disney World Lightning Lane Tips
If you’re new to the Lightning Lane Multi Pass and Single Pass system, be sure to check out our Complete Guide to Lightning Lane Passes at Walt Disney World first before you dive too far into these tips:
Book your most difficult Lightning Lane day first
When you are pre-booking your selections, you’ll do so one day at a time. For that reason, it makes the most sense to book your most difficult day first. This is similar to hard-to-get dining reservations, where we suggest booking in order of difficulty and *not* chronological order.
This is true for BOTH Lightning Lane Single and Lightning Lane Multi Pass options (we’ve noted which attraction is which below).
Thankfully, we don’t just have to use our best guesses to figure out which ones are the top priorities because Thrill-Data.com tracks that info for us.
As of the time of the writing of this article, here are the attractions you should be prioritizing:
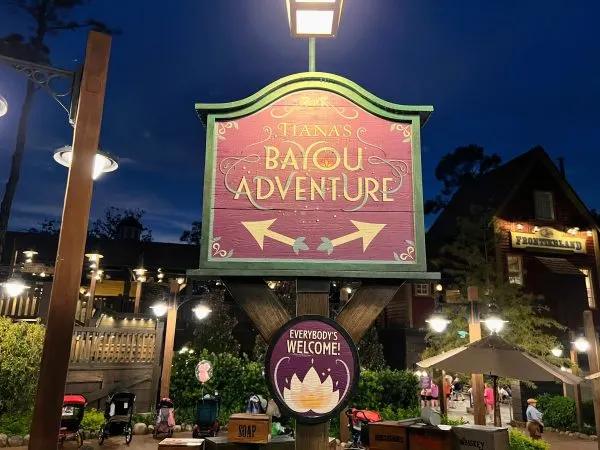
- Tiana’s Bayou Adventure (Magic Kingdom) – Lightning Lane Multi Pass
- Slinky Dog Dash (Hollywood Studios) – Lightning Lane Multi Pass
- Remy’s Ratatouille Adventure (Epcot) – Lightning Lane Multi Pass
- Guardians of the Galaxy: Cosmic Rewind (Epcot) – Lightning Lane Single Pass
- Toy Story Mania (Hollywood Studios) – Lightning Lane Multi Pass
- Star Wars: Rise of the Resistance – (Hollywood Studios) – Lightning Lane Single Pass
- Avatar Flight of Passage – (Animal Kingdom) – Lightning Lane Single Pass
- Frozen Ever After – (Epcot) – Lightning Lane Multi Pass
- Na’Vi River Journey (Animal Kingdom) – Lightning Lane Multi Pass
We do think that Disney will continue to tweak the availability for attractions, which means we could possibly see this list change slightly. So if you’re reading this article way in advance of your next trip, be sure to come back as you get closer to your Lightning Lane booking window for the most up-to-date information.
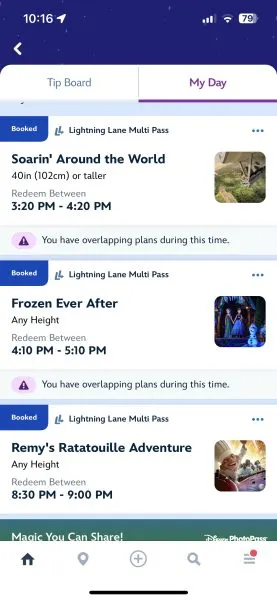
Lightning Lane times can overlap
When pre-booking your Lightning Lanes, Disney will suggest return times for each attraction, typically spaced out to avoid overlap. However, after booking, you can modify these times to create overlaps, which can help you avoid gaps in your day.
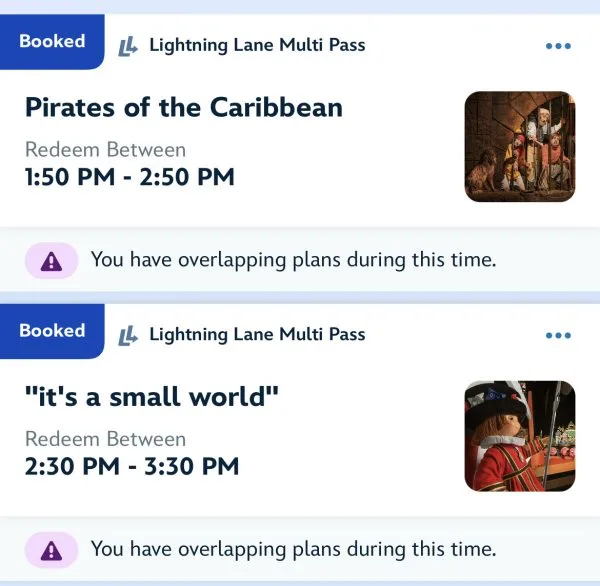
How much you overlap depends on how you prefer to tour, but for reference, we typically overlap a full 30–45 minutes.
Just as an example, that would look something like this:
- Tiana’s Bayou Adventure – Return time: 9:00 am–10:00 am (booked early in the day so we can immediately start churning attractions)
- Haunted Mansion – Return time: 11:10 am–12:10 pm
- “it’s a small world” – Return Time 11:45 am–12:45 pm
Just remember, overlapping works best when attractions are close together to avoid unnecessary rushing.
More Lightning Lanes can be booked once you tap into your first pre-booked Lightning Lane
You can hold a maximum of 3 Lightning Lane Multi Passes at a time (with one caveat we’ll discuss below), so as soon as you tap into one Lightning Lane (before you even board the attraction if possible) you should immediately be looking to add another.
And, if you have a Park Hopper eligible ticket, you’ll even be able to book your next one in a different park.
Plus, as an added bonus, when booking or modifying attractions after you’ve used your first one, the Groups (or Tiers) do NOT matter.
So, while you can only preselect one Group 1 attraction from home, when you are in the parks, if they are available, you can select and modify to hold up to your maximum of 3.
This process is called “churning” and staying on top of it will mean you’ll be able to maximize the total number of Lightning Lane passes you use that day.
We recommend you book at least 1 Lightning Lane in the first 60 minutes a park is open. Ideally, you can Rope Drop and ride 1 to 2 attractions without using Lightning Lanes, and then use a reservation for a Lightning Lane ASAP after that so you can immediately be looking for your next Lightning Lane to snag.
If you plan to Park Hop, use Park Hours to your advantage
If you plan to Park Hop, you won’t be able to pre-select attractions in 2 different parks. BUT – as soon as you tap into your first Multi Pass attraction of the day, you’ll be able to book your next attraction anywhere – including at other parks.
The other thing that happens after you tap into your first Multi Pass of the day is you’ll be able to then modify your remaining Multi Pass attractions to a different park, too.
That’s why when Park Hopping, it makes sense to start your day at the park that opens the earliest so that you can use your first Lightning Lane Multi Pass ASAP.
Our preferred park to start at is Animal Kingdom. It tends to open the earliest, which means you can use a Lightning Lane (or two) early in the AM and then start stacking at the park you’re Park Hopping to next.
Plus, it is also the easiest to tour without using all 3 Lightning Lane Passes, so you’ll be able to modify your Lightning Lanes to the park you’re hopping to without standing in long lines.
Here’s a sample of what that might look like:
At Home
- Pre-select 3 attractions at Animal Kingdom. We recommend Kilimanjaro Safaris (as early in the AM as you can), Expedition Everest (first hour, but you may not need it), and Na’Vi River Journey (first hour, but you may not need it). Purchase a Lightning Lane Single Pass for Flight of Passage.
Early Theme Park Entry
Make sure you arrive at Animal Kingdom at least 30 minutes before the start of Early Theme Park Entry.
- Ride Na’Vi River Journey STANDBY
- Ride Expedition Everest STANDBY
After the Park Opens
- Ride Kilimanjaro Safaris – as soon as you tap into that ride (there is 1 tapstile at the entrance and sometimes a second one at the merge point between the Standby and Lightning Lane lines), select an attraction at the park you are Park Hopping to. We recommend you look for a Group 1 attraction.
- At this point, if you do NOT need your Lightning Lane Passes for Na’Vi or Expedition Everest, consider modifying those to attractions at the park you are Park Hopping to. Again, look for Group 1 attractions.
- Continue riding attractions at Animal Kingdom using the Standby Lines. The only major attractions left will be DINOSAUR and Kali River Rapids. Both of those have low waits early in the morning. Then, you can visit the shows (as scheduled – we recommend Festival of the Lion King before noon if you can) or explore the trails around the park.
Using this method, we’ve successfully been able to stack three Group 1 attractions at Epcot. This isn’t always the case, but it *is* possible to get some really good options lined up for your group for later in the day.
Single Pass Lightning Lane refunds can be requested in My Disney Experience
It can be really frustrating if you find an attraction you are planning to ride is down.
It can be EXTRA frustrating when you’ve paid to ride that attraction using a Lightning Lane Single Pass.

When that happens, you’ll have a couple of options:
- Wait for it to come back online. Even if the attraction was down during your window, your Single Pass will be converted to allow you to ride the attraction anytime else that day.
- If you are leaving the park or won’t be able to ride, you can request a refund. You can do that in person, but an even easier way to do it is via the My Disney Experience app. You can find the chat feature by searching for “chat” on the app. Just keep in mind that you can NOT have redeemed your pass, and they will be able to tell whether you have or not.
If you have a split stay, you’ll be able to book for your whole trip
We weren’t sure if Lightning Lane booking dates for split stays would be similar to dining reservations, where you have multiple dates when you can book dining reservations.
But thankfully, it appears that with Lightning Lanes, you’re able to book for your whole trip all at once, so it does not work like dining reservations.
We have heard mostly success stories, but if you do have a split stay and run into any issues, you’ll need to contact Disney for assistance, unfortunately.
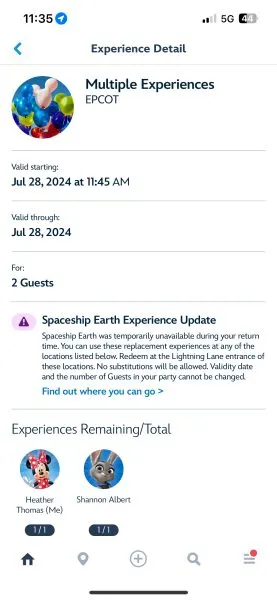
Multi pass experiences will be converted when rides go down
If you have a Lightning Lane Multi Pass for an attraction that goes down, that Lightning Lane Multi Pass will be converted to a “Multiple Experience” recovery pass that can be used at the attraction that closed OR at a selection of other attractions.
The list you’ll be able to use it on will depend on if the ride was a Group/Tier 1 or Group/Tier 2 attraction.
While it is always a bummer to have a ride go down when you’re amped to ride it, there ARE some advantages to these Multiple Experience recovery passes – including the fact that they do NOT count against your 3 Lightning Lane Multi Pass maximums.
This is a very nice perk, especially considering in most cases attractions do eventually come back online, and that recovery pass you’ll get will work on it later.
And there is no limit to the number of the Multiple Experience recovery passes you can have in a day. If you run into multiple attractions going down for a short bit during your window, you’ll get one each time it happens, which can definitely work into your favor if you’re planning to be at the park long enough to use them.
Single Passes work a little bit differently. If you have purchased a Single Pass and that attraction goes down, your Single Pass will be converted to a pass without a return window (you’ll be able to use it anytime during the day).
**********************
And there you go! 7 of our BEST tips when using Lightning Lanes at Walt Disney World. Did we miss any? Tell us about it in the comments.