


Disney World guests have a new skip-the-line service to learn. But, we have good news! The new system – Lightning Lane Multi Pass and Lightning Lane Single Pass – are way more intuitive than the previous version.
Our Complete Guide to Lightning Lane Passes at Walt Disney World is the place to go for specifics on what all this service offers.
Here we’ll show you how to buy Lightning Lane Multi Pass and Single Pass. We’ll include tips on how to modify as well.
Step-by-step guide to selecting and purchasing Lightning Lanes
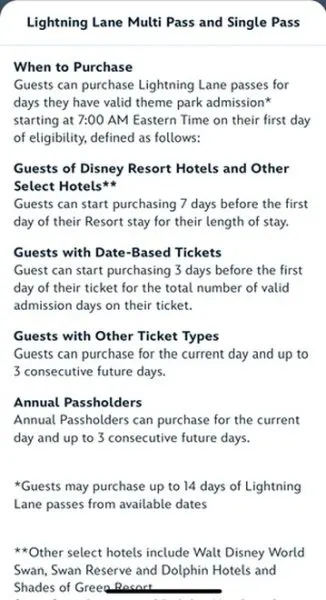
Remember: Lightning Lane Multi Pass and Single Pass can be purchased in advance of your trip. If you are onsite, it’s 7 days prior to your trip and 3 days if you are offsite.
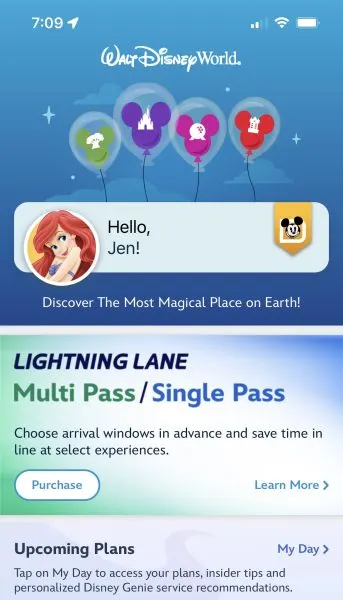
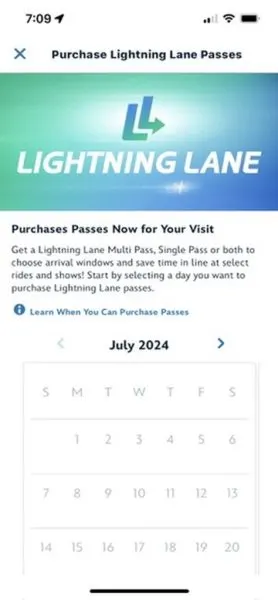
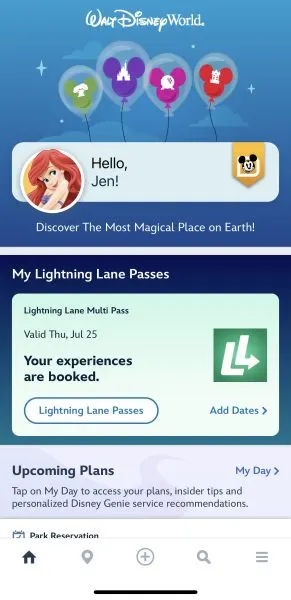
First, open up your My Disney Experience App. On the main page you will see a greeting similar to this. Click the purchase button. Don’t worry, with this version you get to make your actual selections BEFORE you submit payment.
Next, you will see a calendar where you choose the date you’d like to purchase Lightning Lane Multi Pass OR Lightning Lane Single Pass OR both.
You may only select one day at a time. Though if you are an onsite guest or an offsite guest with a date-based ticket, you may buy for all the days of your trip on the same morning, but each day will be a separate purchase.
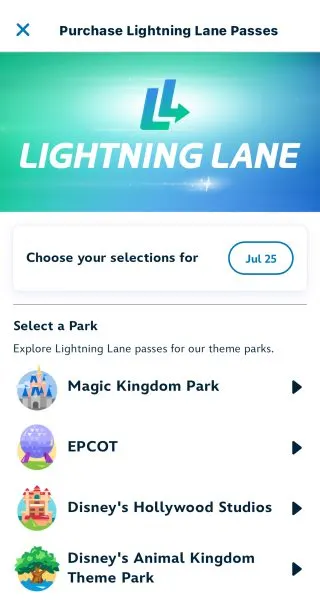
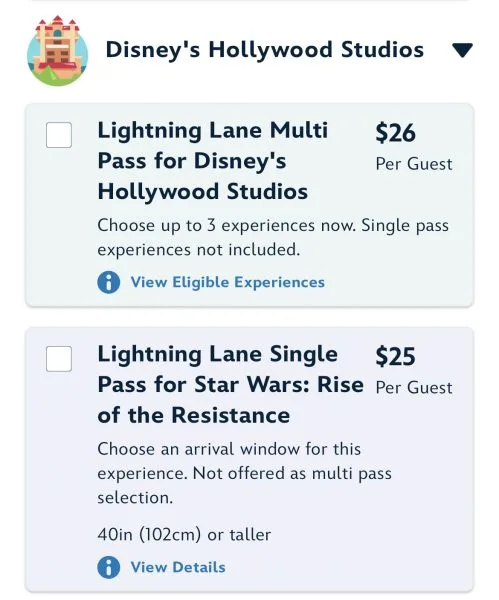
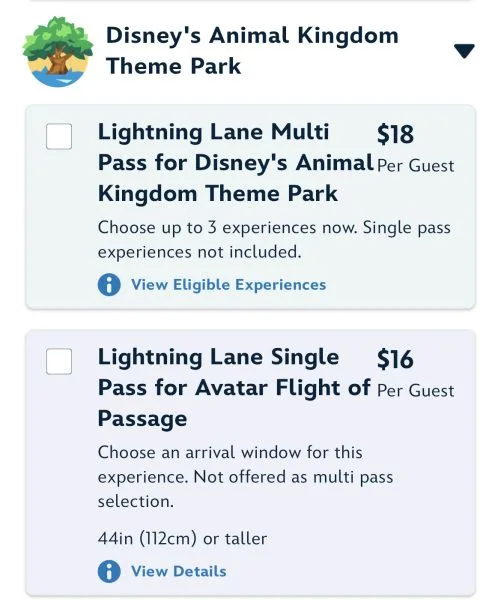
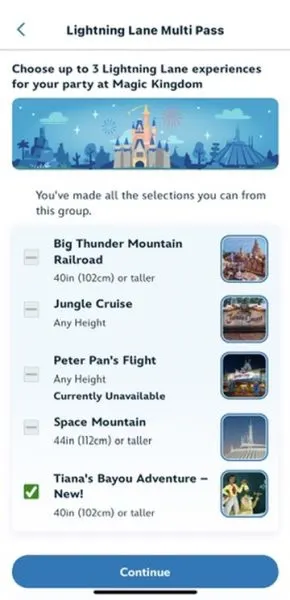
Here you choose your park you would like to make your selections for. All pre-selections for Multi Pass must be made in the same park. Single Pass selections can be at different parks.
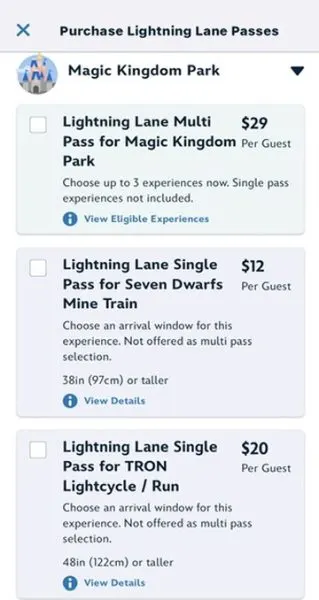
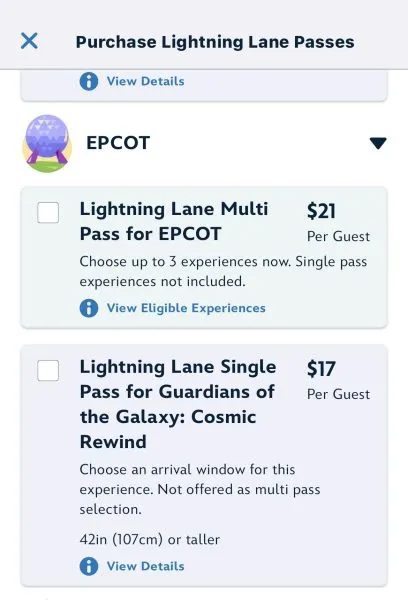
This is what each park screen looks like. (Note, prices vary by the day. This is an example of one day.)
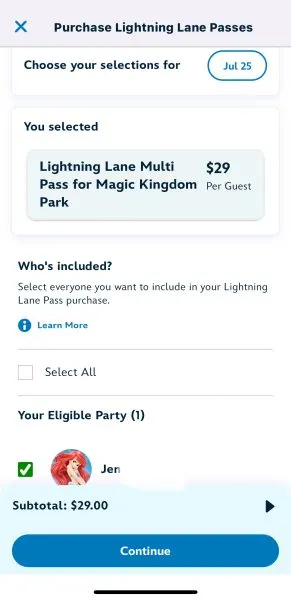
Once you choose your park, then you’ll select your party. (Note: if members of your party would like different pre-selections, those must be done in separate transactions.)
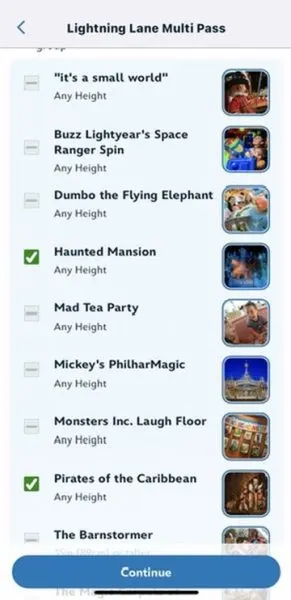
Now to the fun part – choosing your attractions! If the attraction is not available, it will be unable to check.

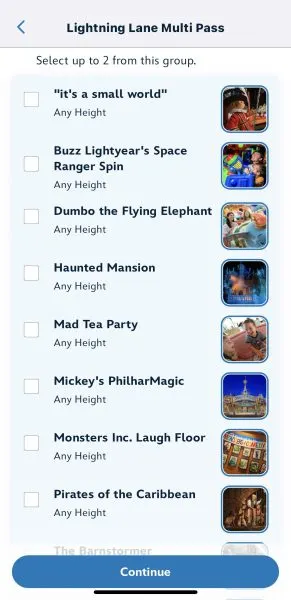
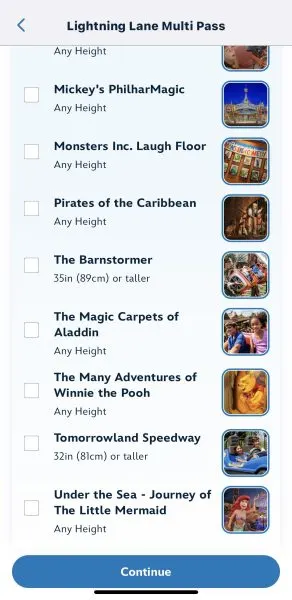
Once you’ve chosen your allotment of attractions, the rest grey out.
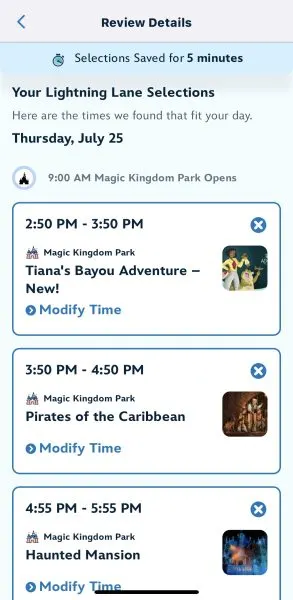
Clicking the continue button brings you to this screen. Times default to what the system initially assigns. However, if those are not the times you would like, it is easy to modify them.
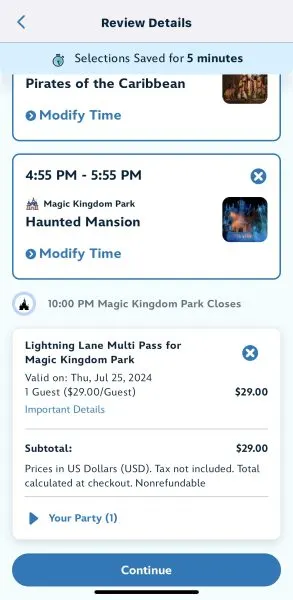
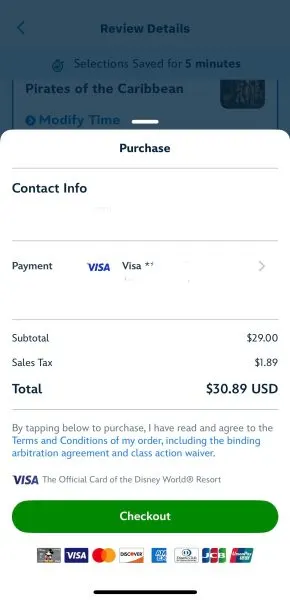
Click Continue and you will be shown this screen to complete your purchase.
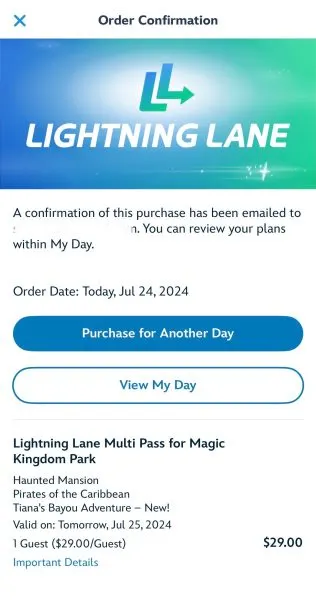
You will see a confirmation screen and then have the option to buy Lightning Lane Multi Pass and/or Lightning Lane Single Pass for additional days.
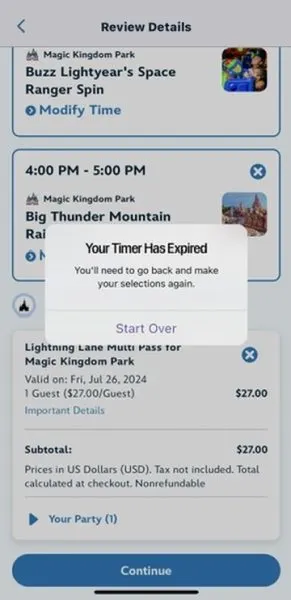
If you do not complete your purchase within 5 minutes, your selections will be released and you will see this screen.
How to modify Lightning Lane selections after purchase
Once you have purchased Lightning Lane Multi Pass and/or Lightning Lane Single Pass, you can modify the time and the experience. You cannot, however, change the members of the party.
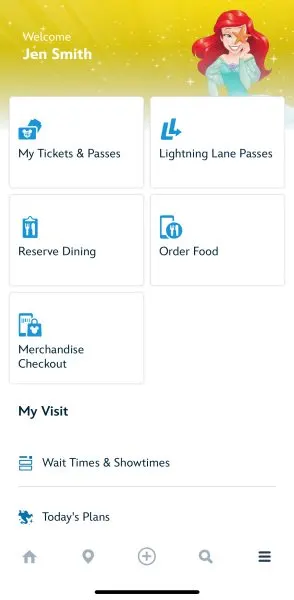
You can access your Lightning Lanes either from the home screen of My Disney Experience or in the main menu with the three horizontal lines in the lower-right corner of the screen.
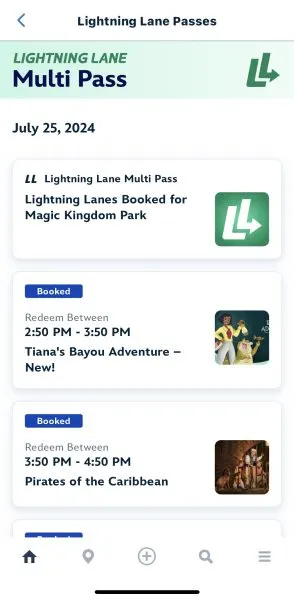
From there, a list of your lightning lanes appears.
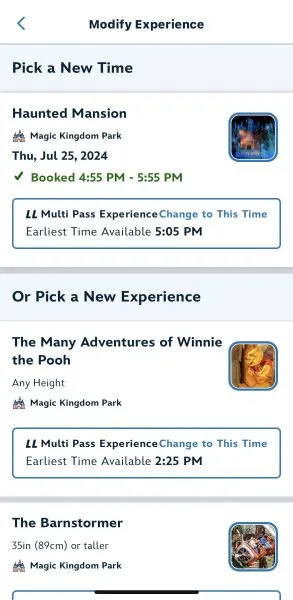
Click on the selection you would like to modify.
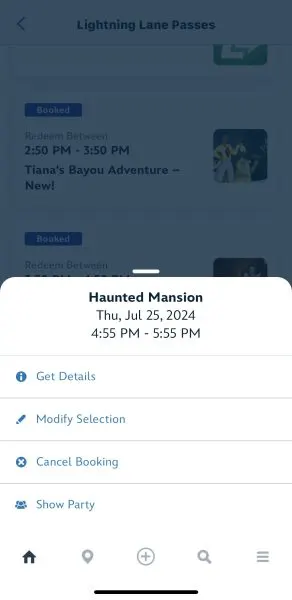
Clicking Modify Selection brings up this screen. From here you can choose another available attraction (still within the pre-selection grouping rules) and/or another time. These times and attractions are dynamic, so options will change.
Clicking continue brings up this Review Details screen. Your modification is saved for 5 minutes.
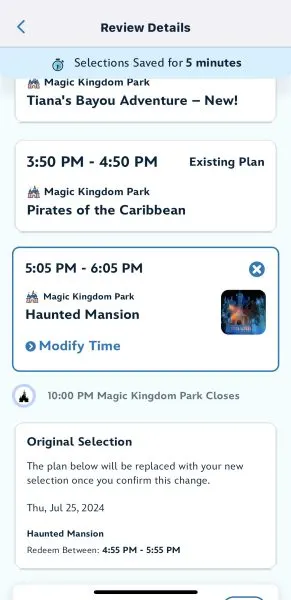
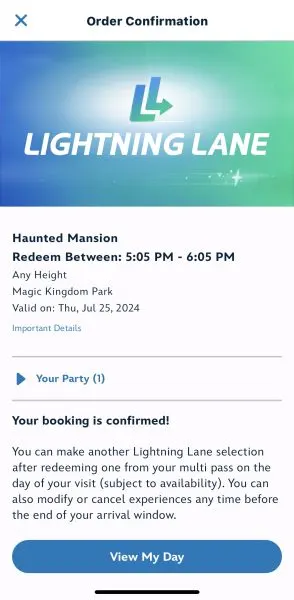
Once you see this screen, you have confirmation your modification has been saved.
The day-of modification process works the same way.
All about Lightning Lane booking strategy
Have questions about the best strategies for which lightning lanes to choose to optimize your touring? We have you covered. Check out these links for more about touring strategies specific to each park.